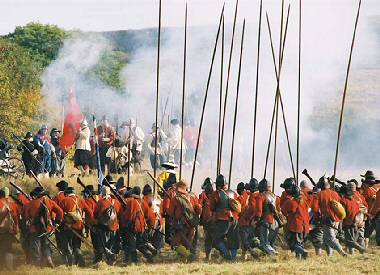
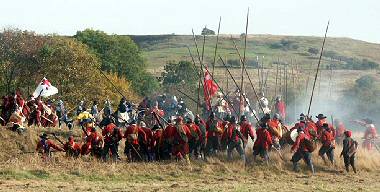
The following text is taken from a magazine I was recently sent a copy of, it included a brief but fairly full account of the Battle of Winwick Pass, the description of the historical events at Winwick preceded the main section of the magazines article, which was to set the scene historically for a Miniature WarGaming event of the Battle.
I could have re-written the article to remove the War Game referances, but I decided to leave them in, because the details for numbers of soldiers, horses etc add to the general interest of the battle description
Last Stand of the Blue Bonnets
The Battle of Winwick Pass, 19 August 1648 by John Barratt
The Campaign
By the night of 17 August 1648, after a day of bitter fighting in the fields outside the town of Preston, the English Parliamentarian forces of Oliver Cromwell had inflicted a major reverse on the Anglo-Scottish Royalist army of the Duke of Hamilton. But the victory was far from complete.
The bulk of the Royalist losses had been borne by the English troops of Sir Marmaduke Langdale, and the Scottish contingent, which at the start of the campaign had totalled some 15,000 horse and foot, was still substantially intact, and occupying a strong defensive position on high ground on the southern bank of the River Ribble.
Cromwell, with about 6,000 men available, was heavily outnumbered, particularly as he detached some 2,000 Lancashire militia to mop up enemy stragglers around Preston and guard his rear against any intervention by Scottish and Royalist detachments which remained intact further north.
Following the days fighting, Hamilton and his commanders held a Council of War to decide on their next move. Whilst serious, their position was by no means hopeless. They might decide to make a stand where they were, or, as Cromwell anticipated, the Scots could attempt to re-cross the river and head back northwards. A third option was to push on south to link up with Royalist activists in Cheshire and North Wales.
Hamilton and his commanders were them-selves divided. The most experienced of them, including the Major-General of Foot, William Baillie and the Adjutant-General, Sir James Turner, favoured holding their ground on Walton Hill and fighting a defensive action. However Hamilton, and his second-in-command, the Earl of Callendar, were for once agreed in pressing for a retreat in order to link up with the Scots horse under the Earl of Middleton, who had returned north from the vicinity of Wigan. They got their way, but the decision would soon prove to be a serious error.
Orders were given for the Scots foot to pre-pare for adrumless march under the cover of darkness and heavy rain, with the intention of gaining a head start on Cromwells forces before their move was discovered. Orders were given for the destruction of the Scots baggage train, along with most of their artillery, ammunition reserves and such food supplies as were available. Not only was this bungled, so that most of the wagons fell intact into English hands, but the weary Scots foot were left without food, and with only the ammunition they could carry. Morale among the already dispirited soldiery plummeted further.
A total of about 7-8,000 Scots foot probably set out on the first stage of the march to Wigan. At first, the move went undetected by Cromwells cavalry outposts, probably tired by the days fighting and more concerned about seeking cover from the torrential rain than in observing enemy movements. They seem to have been alerted to what was happening when the leading units of Middletons horse, who, marching north via the road through Chorley instead of the one via Standish along which their foot were retreating, narrowly missed their comrades and ran into Cromwells men.
The Scots horse now deployed as a rearguard to cover their foot, and Cromwell urged his weary men into an immediate pursuit. He probably had available about 2,500 horse and just over 4,000 foot. The Scots had proceeded for about 3 miles before the leading units of Cromwells horse caught up with them in a series of skirmishes and rearguard actions which were to continue through-out the next day.
Cromwell had given command of the pursuit to Colonel Francis Thornhaugh, an experienced Nottinghamshire soldier who had fought with distinction throughout the First Civil War, with orders to attempt to delay the Scots until the remainder of the army could come up. Thornhaugh, with about 2,5000 horse and dragoons, met up with the Scots cavalry rearguard, including some lancers, near Chorley. He had taken up the pursuit with such haste that he had apparently not had time to don his armour, and, attacking too boldly, became separated from his men, and was mortally wounded, “being run through the body, thigh and head by the Enemys lancers.”
Despite such setbacks, the Parliamentarian horse kept up the pressure. Early on 18 August, the Scots attempted a stand on some high ground just outside the village of Standish. Middletons horse prepared to support the foot, but Baillies musketeers, their powder soaked by the continuing heavy rain, would not hold, and Middleton covered their retreat into Wigan. Cromwell wrote of these events: “Our horse still pursued the Enemy; killing and taking divers all the way. At last the enemy drew up within three miles of Wigan; and by that time our army was come up, they drew off again, and recovered Wigan before we could attempt any thing upon them. We lay that night in a field close by the enemy; being very dirty and weary, and having marched twelve miles of such ground as I never rode in all my life, the day being very wet. We had some skirmishing, with the enemy, near the town; where we took General Van Druske and a Colonel, and killed some principal officers, and took about a hundred prisoners.”
Although theoretically known for its Royalist sympathies, Wigan was thoroughly plundered by the hungry Scots, among some of whom discipline was beginning to break down. Hamilton now decided to head for the Mersey at Warrington, whose bridge represented the lowest crossing point of the river, apart from a ford a few miles further downstream. Here he could attempt a stand, whilst awaiting news of the English and North Wales Royalists supposedly in arms in the area.
The Scots retreat was resumed the same night, with Middletons horse once more forming a rear-guard just north of Wigan, whilst Baillie and Sir James Turner attempted to organise an orderly withdrawal by the foot. He was marching out of the town with the brigade forming the rearguard when some of Middletons horse appeared in disorder. In an attempt to cover their retreat against Parliamentarian horse, Turner formed up a block of pikemen in the market square, ordering the remainder of his foot to march on. How-ever, when Turner told his pikes to open their ranks to let the fugitives through, they panicked, and with shouts of All of you are Cromwells men!”, two of them ran at Turner with their pikes and slightly wounded him in the thigh. Turner retaliated by ordering the horse, who had shakily rallied, to charge their own foot, but the cavalry hesitated until their officers set up the cry that the enemy was upon them. This caused the horse to surge forward, breaking through or trampling the foot.
Fortunately for the Scots, the bulk of Middletons horse kept better order, and continued to cover the retreat through the night and into the next morning. Turner attempted to snatch a brief rest in a house along the line of march, but constant alarums of enemy approach, caused him to remount and press on, though he fell asleep in the saddle.
Sporadic skirmishing continued through the night and into the following morning, with starving Scottish troops pausing to plunder wayside houses even whilst their comrades were being killed outside by the pursuing enemy horse. The Parliamentarians were by now almost equally exhausted, though some at least were more fortunate in obtaining refreshment. Some of Colonel John Brights Yorkshire Regiment of Foot halted briefly towards morning on a moor outside Wigan, where Captain John Hodegeson shared a pint of strong waters with his comrades, Captain Spencer and Major Cholmley. Within a few hours the Major would be dead, for the hunted Scots were about to turn at bay.
Winwick Pass ? the Battlefield
By about midday on 19 August, the situation of the Scots was plainly becoming desperate. Harried at every step of their march, and with increasing numbers of their foot dropping out through hunger and exhaustion, it was clear to their commanders that the army would disintegrate unless they could gain a breathing space on arrival at Warrington, in order to rest, reorganise and pre-pare some defences whilst considering their next move. It was, therefore, necessary to inflict a check on their pursuers which might give them that vital respite. About a mile south of the small town of Newton, and some three miles outside Warrington, Major-General William Baillie found a defensive position which seemed to promise just such an opportunity.
On the southern boundary of the township of Newton, a wooded valley branched off east-wards from the Wigan-Warrington road. The northern side of the valley, known locally as Red Bank, formed the boundary of Newton Park, and was marked by a high man-made bank with a hedge running along it. On the opposite side of the valley, which was about 100 yards wide, was a steep-sided sandstone bank, between twenty and thirty feet high, probably topped by a hedge. The valley itself was marshy, probably with a rough track running along it, and containing a stream and possibly a willow bed. On the southern side of the valley was a large open field, traditionally said to have been under wheat at the time of the battle, which ran south-wards to the hamlet of Winwick, just under a mile away.
The stream crossed the main road, and joined Newton Brook on its western side, where there was further high ground, with an isolated sand-stone bluff formed by the winding course of Newton Brook. This formidable position offered the Scots a last opportunity to halt their pursuers short of Warrington, and, probably about midday on 19 August, the Scots were in position.
The Battle
Hamilton and the Earl of Callendar, with the horse, had continued in the direction of Warrington, presumably to begin organising its defence, but the bulk of the Scots foot had probably been left under Baillies command to hold Winwick Pass. Just how many he had left after the hazards of the retreat is nowhere stated, but somewhere in the region of 4,000 is probably a reasonable estimate. Presumably they continued to be organised into three or four ad hoc brigades, but Baillie now massed his pikes, perhaps 1,000 men, In the centre, holding the Wigan-Warrington road itself, and probably positioned on the crest of the slope by which it ascended the side of the valley. The Scots apparently had time to throw up some hasty earthworks or barricades. The hedges on either flank, along the southern side of Red Bank valley and the bluff on the western edge of the road, were lined with musketeers, and, judging by a cannon shot later found on the site, the Scots probably still had a few of their excellent frame guns with them.

Traditionally, Baillie established his headquarters, perhaps with a small reserve, at Cop Holt Farm, about 250 yards behind the Scottish left. Although none of their accounts specifically admit to it, the Parliamentarians seem to have been taken unawares by the Scots stand. It may have been some of the pursuing horse who first ran into trouble. Captain Hodgeson wrote, “We pursued them to Winwick, where we found the horse was fled towards Warrington Bridge, and the foot drawn up in a most advantageous place, and snaffled our forlorn and put them to a retreat.” This description might refer either to horse or to a first probing move by an advance party of Cromwells foot, but in any event it was clear that the Scots position was a formidable one.
Baillies aim was to fight for time. If he could hold off the Parliamentarians until nightfall, there might be time to prepare adequate de-fences for Warrington Bridge, over which, to the temporary safety of the southern bank of the Mersey, his foot could withdraw under cover of darkness. Cromwell will have been equally aware that time was of the essence, and as a result, as more of his troops began to come up, resumed the assault without waiting for all of his foot to arrive. This action, probably involving Brights Foot, resulted in another reverse, as Cromwell admitted: “We held them in some dispute till our army came up, they maintaining the passe with great resolution for many hours, ours and theirs coming to push of pike and very close charges and forced us to give ground…” The main action was probably focused along the road, with the Parliamentarian foot attempting to force back the Scots centre, whilst parties of musketeers and dragoons operated on either flank, trying to sup-press their enemy counterparts on the high ground flanking the road. But Parliamentarian efforts to break through were thwarted by fierce resistance. The Scots “so rudely entertained the pursuing enemy, that they were compelled to stop until the coming up of Colonel Prides Regiment of Foot…” It may have been during this phase of the action that Major Cholmley, of Brights, was killed.

A pause of undetermined length followed, whilst the remainder of Cromwells force came up, and deployed on the open ground of Newton Park. At this point, some local men alienated by the Scots plundering, offered to show Cromwell a way by which his horse could outflank the Scottish position (probably by moving east across Newton Park, and then southwestwards along the lane leading towards Winwick from the hamlet of Hermitage Green).
In the meantime, possibly in response to appeals from Baillie, some of the Scots horse reappeared from the direction of Warrington, and began forming up on the open field to the south east of Winwick Pass, but on sighting Cromwells cavalry approaching, they made off without resistance. Threatened on their right flank, and potentially in their rear, by the Parliamentarian horse, and hit by a new infantry assault spearheaded by Thomas Prides veteran unit, who “after a sharp dispute, put these same brave fellows to the run…” the Scots fell back along the road and across the large field in the direction of the village of Winwick, about one mile to the south east. They evidently kept some sort of order in what became a running fight, and suffered a number of casualties, among them, perhaps, an unidentified officer who had played a leading role in the defence of Winwick Pass; “a little spark in a blue bon-net, who performed the part of an excellent commander, and was killed on the spot.”
Some of the Scots foot, perhaps cut off by the Parliamentarian horse, made a final stand on Winwick Green, a possibly partially enclosed area of ground just to the north of the church. Here the Parliamentarians “made a great slaughter of them…” Many of the Scots threw down their arms, though others resisted for a short time longer in the church and some of the village houses, be-fore surrendering and being imprisoned temporarily in the church. Parliamentarian horse maintained the pursuit of Baillies broken foot almost as far as Warrington.
Aftermath
The defeat at Winwick Pass was more decisive for Hamiltons army than the previous encounter at Preston, where losses had mainly fallen on Langdales English Royalists. As usual, estimates of casualties vary, but Cromwells own claim of 1,000 Scots killed and 2,000 prisoners (possibly including some later taken at Warrington), seems reasonable. Parliamentarian losses are unknown,but given Cromwells initial reverses, may well have been significant.
Baillie and Turner arrived in Warrington to find that Hamilton and Callendar, with the horse, had already left, heading south over the Mersey and leaving orders for Baillie to seek what terms he could for the foot. The veteran soldier, naturally of a fiery disposition, was furious, and briefly gave way to despair and beseeched any that would to shoot him through the head. Whilst Turner rode off to catch up with Hamilton, Baillie completed the barricades on Warrington Bridge, behind which he drew up what remained of his foot. But this was only for show. Many of the Scots infantry were deserting and seeking shelter in nearby Dallam Forest, whilst of the 2,700 remaining with the col-ours, many were without food, arms and ammunition, and were close to mutiny.
Baillie met Cromwell at the bridge and agreed terms. The Scots surrendered as prisoners of war, giving up their colours and arms. Few of the rank and file ever seem to have found their way home, dying either in prison, or from hard usage and disease in England or as near slave labour in the West Indies.
Hamilton, with about 3,000 horse, survived a few days longer, heading with increasingly aim-less desperation south through Cheshire and into Staffordshire, followed by Cromwells horse, so weary that they could scarcely move at a faster pace than a walk. On 25 August, his men in a state of mutiny, and with Parliamentarian forces closing in on all sides, Hamilton surrendered at Uttoxeter. Apart from a few stubbornly resisting Royalist garrisons such as Colchester and Pontefract, the Second Civil War was over.
Wargaming Winwick Pass
The encounter provides an interesting, reason-ably short and manageable game, for anyone wishing to explore a lesser known engagement involving the Scots and the New Model in one of Cromwells most neglected, and perhaps hardest-fought, battles. The Armies Parliamentarian Commander: General Oliver Cromwell (LV3) may command horse or foot
HORSE
In all somewhere in the region of 2,500 horse were available. They consisted of four and a half New Model Army regiments, and one of the Northern Association. It is suggested that organisation should be as follows.
Commander: Major-General John Lambert (LV2)
Oliver Cromwells Regiment (Major Blackmore, a godly man and a good souldier) Formerly Vermuydens, but taken over by Cromwell on the eve of Naseby, this was a highly experienced unit. 480 men (14 figures) rated: cavalry gallopers, Veteran/Elite.
Thomas Harrisons Regiment. Formerly commanded by lames Sheffield, this was another veteran New Model unit. Harrison had been wounded prior to Preston, and the regiment was temporarily led by Major William Rainborowe, with Captain Henry Cromwell, the fourth son of Oliver Cromwell, among his officers. 400 men (12 figures) rated: cavalry gallopers, Veteran.
Phillip Twisletons Regiment. Commanded for much of the First Civil War by Edward Rossiter, this was another experienced unit. 450 men (13 figures) rated: cavalry gallopers, Veteran.
Francis Thornhaughs Regiment. Raised in Nottinghamshire, where it had seen considerable action during the First Civil War. Thornhaugh had been seriously injured at the Battle of Rowton Heath in 1645, but his luck ran out in the pursuit from Wigan. At Winwick the Regiment was commanded by Major Thomas Saunders. 450 men (13 figures) rated: cavalry gallopers, Veteran.
Adrian Scroopes Regiment. Formerly commanded by Richard Graves, this unit was not present at Naseby, and had not particularly distinguished itself during the closing campaigns of the First Civil War. Scroope and part of the Regiment was operating in the South of England, and only three troops, under Major Barton, were with Cromwell. 240 men (I I figures) rated: cavalry gallopers, Veteran.
John Lamberts Regiment. Part of the Army of the Northern Association, this unit had seen considerable action in the North during the First Civil War, including Marston Moor, and had distinguished itself in the earlier stages of the 1648 campaign. 450 men (13 figures) rated: cavalry gallopers, Veteran.
Robert Lilburnes Regiment. Another Northern Association regiment, with a record similar to Lamberts 450 men (13 figures) rated: cavalry gallopers, Veteran.
DRAGOONS
John Okeys Regiment. Two companies. 200 men (6 figures) rated Veteran. May fight mounted or dismounted, but count at only half strength if engaging in combat whilst mounted.
FOOT
Commander: Colonel Thomas Pride (LV2)
Lord Fairfaxs Regiment (Lieutenant-Colonel William Cowell). Formed early in 1645 from troops of the Army of the Eastern Association. Fought at Naseby. 750 men (23 figures) musket/pike ratio 2:1. Rating: Veteran.
Robert Overtons Regiment (Lieutenant-Colonel Thomas Reade). This unit traced its origins back to the Army of the Earl of Essex during the First Civil War. Only six companies took part in the Preston campaign. 450 men (14 figures) 2:1. Rating: Veteran.
Richard Deanes Regiment (ex Thomas Rainsborowe). Fought throughout New Model campaigns of First Civil War. 750 men (23 figures) 2:1. Rating: Veteran.
Thomas Prides Regiment. Possibly the strongest of Cromwells Foot Regiments. Pride, according to some versions, originally a brewers apprentice, was one of the most capable Parliamentarian infantry commanders. 800 men (25 figures) 2:1. Rating: Veteran.
John Brights Regiment. A Northern Association unit, which had fought alongside the Fairfaxes throughout the Northern campaigns of the First Civil War. It had done well at Preston, and its ranks my have been somewhat depleted as a result. 700 men (21 figures) 2:1. Rating: Veteran.
The Parliamentarians had no artillery.
The Scots Army
The actual Scots Order of Battle at Winwick is much less easy to construct than that of their opponents. The Army which invaded England in 1648, was built around the core of the remodelled army of 1647, expanded by a large number of newly levied units. Most of these never reached their intended strength, and had been reduced still further by the time of the battle by casualties and attrition.
The Scots Army as a result, consisted of a large number of weak units brigaded together in a fairly ad hoc arrangement, to create viable fighting formations. As there are no surviving details of the composition of any of these `brigades, the ORBAT given below, whilst based on regiments known to have been present, is otherwise hypothetical.
General: James, Duke of Hamilton (LV 1). Hamilton proved himself an almost entirely ineffective commander during the Preston campaign, and there is no evidence that he was actually present during the action at Winwick, most probably being in Warrington or already preparing to head south. The same applies to his second-in-command, the Earl of Callendar. (LV I) If players wish to include either of these gentlemen, whose absence Major-General Baillie probably rather welcomed, they should be rated as above, and allowed to command only horse. Instead, Middleton and Baillie should be rated separately in command of the horse and foot, with cooperation between them dependent on a dice throw. Scots units are deliberately rated generously to allow for the particularly stubborn fight, born of desperation, which they put up at Winwick.
HORSE
Commander: John, Earl of Middleton (LVI). Middleton was normally a slightly more effective commander than this rating suggests, but at Winwick he was evidently working to an agenda which saw the preservation of his cavalry as paramount. Allowing for troops left in Warrington, there were probably about 2,500 horse theoretically available at Winwick, drawn from a large number of regiments well below their paper strength of 180 men each. For the purposes of the game, I have organised them into three brigades of approximately 800 men each, under commanders known to have been present on the campaign.
Lord Cranstons Brigade. 800 men (24 figures). Cavalry trotters, rating: raw.
Colonel Robert Innes Brigade. 800 men (24 figures). Cavalry trotters, rating: raw.
Earl Marichals Brigade. 800 men (24 figures). Cavalry trotters, rating: raw.
FOOT
Commanders: Major-General William Baillie (LV2) Lieutenant-Colonel Ogilvie (LV2). (Arbitrarily cast as the little spark in the blue bonnet, though Ogilvy wasnt actually killed in the action!).
The comments made above regarding the organisation of the horse also apply to the foot, with the proviso that details of the units which surrendered at Warrington provide a reasonably full list of the regiments present, with some indication of their strength. Once again, brigade organisation is hypothetical.
Figures in brackets are the numbers from each unit captured at Warrington.
William Baillies Brigade (Lieutenant-Colonel William Ogilvie)
William Baillies Regiment (5 officers, 4 sergeants, 120 men, 3 colours)
Earl of Atholls Regiment (9 officers, 5 sergeants, 155 men, 7 colours)
Lord Barganys Regiment (6 officers, 4 sergeants, 80 men, 2 colours)
General of Artillerys Regiment (3 officers, 5 sergeants, 46 men)
George Keiths Regiment (9 officers, 4 sergeants, 130 men, 5 colours)
Total 1,000 men (30 figures) 2:1, rating: Trained.
Lord Carnegies Brigade (lames, Lord Carnegie)
Lord Carnegies Regiment (II officers, 8 sergeants, 140 men, 4 colours)
Sir James Drummond of Meccans Regiment (8 officers, 2 sergeants, 90 men, 4 colours)
William Earl of Dumfries Regiment (8 officers, 4 sergeants, 44 men, I colour)
Sir John Greys Regiment (3 officers, 2 sergeants, 32 men, 1 colour)
Colonel Harry Maules Regiment (5 officers, 3 sergeants, 119 men, 2 colours)
Total 1,000 men (30 figures) 2:1, rating: Trained.
Duke of Hamiltons Brigade (Lieutenant-Colonel Claude Hamilton)
Duke of Hamiltons Regiment (18 officers, 19 sergeants, 360 men, 8 colours)
Colonel Richard Douglas Regiment (10 officers, 7 sergeants, 124 men, 10 colours)
Lord Hay of Yesters Regiment (19 officers, 12 sergeants, 50 men, 7 colours)
Total 1,000 men (30 figures) 2:1. Veteran.
Earl of Homes Brigade (James, Earl of Home)
Earl of Homes Regiment (13 officers, 14 sergeants, 250 men, 4 colours)
Marquis of Argyles Regiment (10 officers, 5 sergeants, I colour)
Alexander, Earl of Kellies Regiment (5 officers, 5 sergeants, 100 men, 3 colours)
Robert, Lord Roxburghs Regiment (3 officers, 3 sergeants, 30 men, 1 colour)
James, Earl of Tullibardines Regiment (3 officers, 11 sergeants, 116 men, 2 colours)
Sir James Turners Regiment (5 officers, 7 sergeants, 120 men, 3 colours)
Total 1,000 men (30 figures) 2:1. Rating: Trained.
Unbrigaded:
Sir Alexander Frasers Firelocks (6 officers, 4 sergeants, 150 men, 2 colours) 9 figures (treat as dismounted dragoons), rating: Veteran.
Artillery:
Evidence of cannon shot suggests that the Scots may have had some of their famous frame guns at Winwick. For game purposes it is suggested that each brigade should be accompanied by one Ultra Light Gun and crew.
Other Considerations:
Terrain should be laid out as in the map. The Scots foot begin the game deployed on the table, the horse arrives on the south edge as the result of a dice throw made at the start of each Scots game turn. On the Parliamentarian side, Lamberts horse and Brights Foot appear on the northern edge of the table on Turn One, and other units are diced for individually at the start of each Parliamentarian game turn, with an increasing probability of their appearance.
The game should begin at 12 noon, and end at dusk (c.8.00pm).
The Scots gain a victory by succeeding in their delaying action by retaining organised troops on the table at the end of the game, the Parliamentarians by routing the enemy and obtaining complete possession.
Points may also be scored for casualties inflicted.
Sources:
Gary Ashby, Winwick Pass, in English Civil War Notes and Queries, Issue 13.
Peter Berry and Ben Wilkins, Forlorn Hope, 2nd Ed. 1991.
Ernest Broxap, Great Civil War in Lancashire, 1910.
Stephen Bull and Mike Seed, Bloody Preston, 1998.
Edward Furgol, Regimental History of the Covenanting Armies, 1990.
Stuart Reid, Scots Colours, 1990.
Last Stand of the Blue Bonnets: Miniature Wargames Magazine march 2001
The Battle of Winwick Pass, 19 August 1648 by John Barratt
Reproduced Courtesy of Miniature Wargames Magazine
http://www.miniwargames.com